In today’s dynamic world, ensuring the safety and security of a business is paramount. The busy city of Chandigarh, known for its well-planned infrastructure and vibrant commercial activities, is no exception. Businesses of all sizes, from charming retail shops to towering corporate offices, face the challenge of protecting their assets, employees, and customers. Here’s where CCTV cameras come in a reliable security solution that offers peace of mind. This blog will explore how businesses in Chandigarh are utilizing CCTV systems to create a safer and more secure environment.
Step 1: Planning Your CCTV System
Understanding Your Security Needs
The first step to setting up the CCTV surveillance system is to comprehend the security requirements you have. This requires conducting an in-depth analysis of your home to determine areas that require surveillance. Here’s how to accomplish this:
- Conduct a security assessment Conduct a security assessment: Explore your house or office to find the most critical areas. These may include exit and entry points and the cash register, store rooms public areas, as well as the surrounding area of your building. This evaluation will let you know the best places to put your cameras in order to get the maximum coverage.
- Prioritize Surveillance Based on your analysis choose which areas should be given the most rigorous level of surveillance. For instance, the entry or exit points are vital since they are among the most likely areas in which unauthorised access is possible. Additionally, areas where valuables are kept such as cash registers or storage rooms, should be top of the list of priorities.
Choosing the Right Cameras
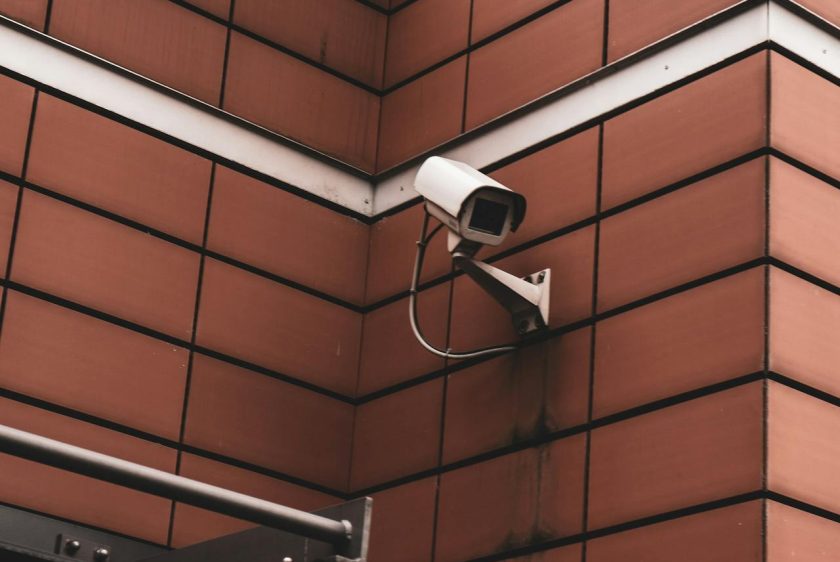
After you’ve determined the locations that require surveillance The following step would be to pick the appropriate camera to be used in each place. There are many types of cameras, each best suited to specific needs:
- Dome Cameras are great to be used for surveillance in the indoor environment. They are discrete and can be installed on walls or ceilings.
- Bullet cameras can be used for outdoor use since they are weatherproof, and can endure harsh weather conditions. They are generally placed on the walls and offer an excellent image of the space.
- PTZ cameras Pan-Tilt-Zoom cameras are ideal to monitor vast areas. They can be controlled remotely for pan tilt and zoom, giving an extensive view of the surroundings.
Considering Recording Options
Another crucial aspect to consider when the process of setting up the CCTV system is deciding how you intend to record and archive the footage. There are two primary alternatives:
- Local storage This is the use of Digital Video Recorders (DVRs) or Network Video Recorders (NVRs) to save your videos on-site. This type of storage allows for easy access to your videos however it requires regular maintenance to ensure that your data isn’t lost.
- Cloud Storage The option enables users to store their footage remotely in the cloud. It provides scalability and remote access, but it requires a reliable internet connection and sufficient bandwidth.
Step 2: Setting Up Your CCTV Cameras
Once you’ve designed your CCTV system The following step will be to install the cameras. Here’s the step-by-step process:
Mounting the Cameras
- Select Camera Locations Begin by examining your home to find the ideal locations for the camera’s installation. Try to cover the largest space with the least amount of blind spots. The most frequent locations are the entrances, exits, huge open spaces, as well as places where valuable assets are kept. Make sure that cameras are placed high enough to stop vandalism or tampering however, not so high that they affect the quality of the video or the fields of view. Also, think about lighting conditions, since poor lighting could affect the performance of cameras.
- Note Drilling Points After you’ve selected the location, place the bracket for mounting or the camera against the ceiling or wall in the area where you’d like to mount it. Mark with a pencil exactly in which you’ll drill holes for the camera’s mounting. It’s crucial to be precise in order to make sure the camera is secured and correctly aligned.
- Drill holes: Utilizing a power drill, make holes in the designated locations. If you plan to mount your camera to a wall, you can use wall anchors to make sure the screws will stay in place. If you are mounting on ceilings, make sure you drill on the solid surface. If your camera’s setup requires cables to run through walls, make an additional hole in the vicinity of the mounting points so that you can thread cables through. Be aware and make sure to check for electrical wires or plumbing within the walls prior to drilling.
- Mount the camera by attaching the mount brackets to the ceiling or wall by using the screws supplied with the camera kit. Be sure that the brackets are secured and sturdy. After the brackets are placed, you can secure your cameras to the brackets. Most cameras come with a locking mechanism or screws to hold them in place. Change the direction and angle of the cameras to make sure that they cover the area you want them to.
- Connect and test After mounting the cameras, connect them directly to your power supply, as well as any other recording or monitoring equipment you’re using like an NVR or DVR. Be sure that all cables are connected and secured in order to prevent disconnecting. Switch on the system, and examine each camera to confirm it’s working correctly and covering the area you want to cover. Make any adjustments that are needed to the camera’s angles.
- Secure cables Last but not least, you should neatly arrange and secure any cables that are exposed by using conduits or cable clips. This is not just a way to keep your cable installation neat, but also protects the cables from harm.
Running the Cables
- Design Cable Routes Start by determining the route of your cables. This is about deciding on the most efficient route to connect each camera your central recorder (DVR/NVR) as well as the power source. Take into consideration the design of your home and the location of your cameras, and the location of the recording device. Make sure you choose the most direct route, while staying clear of obstacles such as windows, doors, or places that are frequented by traffic. Be aware of potential hazards like sharp edges or heat sources that may harm the cables.
- Connect the Cables Make sure you carefully connect the cables of one camera towards the central record device. If you have a wired system, make use of top-quality Ethernet cables (Cat5e or Cat6) to ensure a stable connection. Begin from the location of the camera and work your way to the recording device by securing the cable regularly. If you are using wireless devices, make sure your cameras are within the range from the WiFi signal in order to keep a stable and strong connection. If required, make use of Wi-Fi extenders to increase signals in places that have poor coverage.
- Cover the cables In order to keep an elegant and professional appearance and prevent tampering cover the cables as well as you can. Here are some strategies to hide the cables:
- Make use of Cable Clips Connect the cables to ceilings or walls with cable clips. This helps keep the cables neat and decreases the possibility of them being removed or damaged.
- Installation of Conduits For a more durable and secure solution you can run your cables through metal or plastic conduits. Conduits do not just hide cables, but they also offer an additional layer of protection against physical harm.
- Conduct cables through Walls If you can make holes in walls and connect cables to them. This technique completely conceals the cables, ensuring the highest level of protection and aesthetics.
- Make use of Cable Trays In industrial or commercial environments, cable trays may be placed on walls or ceilings to store many cables in an organized way.
- Hide Hidden Carpets and Baseboards In indoor settings you can put cables underneath carpets or on basesboards, keeping them out of view.
Connecting the System
- Connect cameras to power Every camera is connected to a source of power for operation. Take these actions to make sure you have a correct power connection:
- Connect your Power Adapter: If your camera is equipped with an adapter power it to plug into an electrical outlet nearby. Make sure the adapter is attached to the camera’s power source.
- The power of Ethernet (PoE): If you’re using PoE cameras, they’ll get power via their Ethernet cable, removing the requirement to purchase additional power converters. Be sure that you have Ethernet cables connected to a PoE Switch or NVR/DVR with PoE capability.
- Join the Recording Unit: Depending on whether your device is wireless or wired, the method of connection will differ:
- Wireless Systems The Ethernet cables of each camera to the appropriate ports on the NVR/DVR. Make sure that the connections are secure, and every cable is seated correctly within its port.
- Wireless Systems: Follow the manufacturer’s directions for connecting the cameras to WiFi networks. This usually involves making use of mobile apps or programs to look for cameras before connecting to your networks.
- Link the NVR/DVR to an LCD for viewing and set up your security system you will need to connect the DVR/NVR to the TV or monitor:
- Choose the Correct Cable Based on the ports that are available on your monitor or DVR you can choose to use an HDMI or VGA cable. HDMI is recommended for higher-quality video.
- The Cable Plug either the HDMI or VGA cable into one of them. HDMI or VGA cable in the appropriate port on the NVR or DVR. The other end is connected to the TV or monitor.
- Select the input source You must turn on your television or monitor and choose the right output source (HDMI or VGA) to show the feed from the DVR/NVR.
If you follow these steps, you’ll be able to be able to have your CCTV cameras running in connection to the record device. Connecting the NVR/DVR to a screen allows you to set up, view and manage your security system with ease.
Step 3: Professional Installation
If you want a simple installation, an expert could be the best choice. What you can expect:
Consultation and Planning
- Assessment:
- Online Evaluation A certified installer will come to your home to evaluate your security requirements. In this inspection, they will assess the structure of your property and determine the most important areas that require monitoring.
- Complete Coverage The installer will identify the ideal spots for your cameras in order to ensure complete coverage. This will include assessing entrance places, blind spots and areas that are prone to high activity.
- Recommendations:
- Customized Solutions Based on the analysis the installer will suggest the appropriate type and quantity of cameras to meet your particular needs. They’ll take into consideration aspects like the size of your property as well as layout and security issues.
- The Best Security Options A professional will assist you in choosing the most effective options for the best security and coverage. We will ensure that the system you choose is suited to your requirements and provides the best level of protection for your home.
Installation
- Mounting Cameras:
- Professional Installation Experts will be in charge of mounting cameras with security at selected spots. They are able to make sure that the cameras are properly positioned for the best coverage and efficiency.
- Precision Every camera is mounted with care and precision to reduce the chance of dislodging or tampering.
- Running Cables:
- Clean and efficient Installation: The installers will run the required cables efficiently and neatly and minimize any disturbance to your residence. They will meticulously cover the cables to ensure an elegant and professional appearance.
- Safety considerations Cables will be properly routed to prevent dangers and to ensure the long-term security of your CCTV system.
- System Connection:
- Complete Installation The installers will connect all parts of your system comprising cameras, DVR/NVR and monitors. They will make sure that everything is installed properly and safely.
- Testing When the parts are connected experts will test the system in order to confirm that each camera is operating well and is able to produce clear images.
- Final checks After the system has been fully connected The installers will run final checks to verify there is security for all the connections, and the system is prepared to go into operation.
System Configuration
- Connectivity:
- Proper configuration Professionals make sure the cameras’ are linked to the NVR, DVR network. They will confirm that each camera is connected and receiving power and also verify that the video is sent to the recording unit.
- Settings:
- Flexible Configuration The installer will adjust the system’s settings to suit the requirements of your particular requirements. This involves creating recording schedules and motion detection zones and changing camera parameters like the resolution as well as frame rates.
- Remote Access Configuration: If appropriate the professional will activate remote access, which allows viewers to access the footage of your CCTV from any location with a tablet, smartphone or laptop.
- Testing:
- Complete Assessment It will run a thorough examination of every camera to ensure that it’s functioning properly and is able to produce clear images. They will look for issues like blurriness, pixelation, or connectivity issues.
- Adjustments If needed the professional makes any adjustments to the camera’s position, focus, or settings to improve the performance of the camera and improve image quality.
- Final Verification After testing is completed and the installer has completed its work, it will conduct a final verification to make sure that all cameras function in the way they were intended and provide adequate surveillance coverage.
Training and Support
- User Training:
- Complete Instruction After installation, a professional will offer a comprehensive tutorial on how to operate the new system. They will guide you through the interface of the system and show you how to use live feeds, view recordings, and make use of any other options.
- Interactive Learning The installer will make sure you’re comfortable with the system and able to comprehend the different functions. They’ll be able to be able to answer any questions you ask and offer practical suggestions to increase the effectiveness of your CCTV system.
- Ongoing Support:
- Support for Troubleshooting Numerous professional services provide regular support and maintenance services to ensure that your system will continue to function efficiently. If you have any issues or have any questions regarding your CCTV system, experts will be there to help you resolve the issue quickly.
- Regular Maintenance The service provider could offer maintenance services on a regular basis to keep your CCTV equipment in top condition. This might include cleaning the lens lenses and checking the connections and updating software.
- Upgrades and adjustments When your security needs change and your security needs change, our experts will make the necessary adjustments or updates to your security system. If it’s adding CCTV cameras or updating the software and expanding the coverage of your system, they’ll make sure that your system is modern and efficient.
With extensive training and continuous support, our expert installation and maintenance services ensure you will be able to successfully use and maintain your security system. This will provide you with security that is reliable for a long time to be.
Tips for Effective CCTV Installation
Optimal Camera Placement
- Entry Points:
- Primary Entrances Cameras should be installed at the main entry points, like the front and back doors to keep track of who is entering and leaving your house. These cameras should be set up to record clear images of facial expressions and allow you to identify intruders or visitors.
- Side Doors and Garages Do not forget to install cameras at garage entrances and side doors since they are commonly utilized by criminals to gain entry into the property.
- Perimeter Coverage:
- Driveways Install cameras to protect the driveway to observe foot and vehicle traffic. This will help in identifying any suspicious activity on your property.
- Backyards as well as Side Yards: Ensure that the entire perimeter that surrounds your home, which includes backyards and the side yard is secured. Set cameras up to capture wide angles and eliminate blind spots. This will ensure a thorough security of the outdoor spaces.
- Fences and Gates Install cameras in the vicinity of fencing or gates to watch those entry points.
- Indoor Areas:
- Common Spaces Cameras should be placed in areas that are frequented by people within your home, for example, kitchens, living spaces hallways, and kitchens. These spaces often function as the main routes, which makes them perfect for monitoring the movements within your home.
- Steps and Entrances The camera should be set at the top of the stairs and in the entryway near doors to monitor anyone passing through these key points.
- Valuable Rooms If you have rooms with valuables like an office at home, a secure room, or an entertainment space, you should consider installing cameras for additional security.
If you strategically place cameras in these important spots, you can guarantee complete coverage and increase the safety of your house, both indoors and out.
Ensure Proper Lighting
- Outdoor Cameras:
- Avoid glare Place cameras outdoors to block glare from artificial light sources or the sun that can make footage appear blurred and diminish clarity. Place cameras in eaves or make use of camera hoods to protect lenses from direct sunlight.
- Weatherproofing Make sure that your cameras for outdoor use are weatherproof, and are able to endure different weather conditions, such as snow, rain, or extreme temperatures.
- Night Vision:
- High-Performance in Low Light Utilize cameras with the ability to night see in order to take clear images even in dim lighting conditions. Infrared (IR) cameras can be especially effective in night, offering the ability to see even in total darkness.
- Location Night Vision cameras within areas which require surveillance at night, for example, driveways, entrances, and backyards. Make sure there aren’t any obstructions that might interfere with the IR LEDs that are crucial for night vision functions.
By carefully arranging your cameras outside and choosing models that have night vision, you will significantly increase the effectiveness of your security system, providing solid and clear footage at night and during the day.
Regular Maintenance
- Clean Lenses:
- Cleansing the Lens Regularly Cleaning the lens of your camera to ensure clear and unobstructed images. Utilize an absorbent clean cloth or lens cleaning solution to eliminate dust, dirt and smudges from your lenses.
- Scheduled Maintenance Create an maintenance schedule that will clean lenses every couple of months or more often in the event that your cameras are subjected to extreme conditions in the environment.
- Check Connections:
- Secure Connections Regularly check every connection to ensure they’re secure and working correctly. That includes power cables Ethernet cables and any other connectors that are used within your system.
- Examine for wear and tear Find indications to wear, or damage to cables or connectors. Replace any damaged component immediately to avoid the system from failing.
- Update Software:
- System updates Maintain your system’s software current and up to the latest version to ensure maximum functionality and protection. It includes updates to firmware for camera as well as the DVR/NVR and any other apps for mobile or software for computers.
- Allow auto-updates If you can Enable automatic updates so that your system runs the most current software version and benefit from the latest capabilities and patches for security.
If you follow these maintenance guidelines You can ensure that your CCTV system will continue to function efficiently and effectively, providing you with a consistent security protection.
Conclusion
Installing cameras in your home is an effective way of improving your security. It doesn’t matter if you install the cameras yourself, or employ a professional, knowing the procedure will allow you to make a better decision and provide efficient surveillance. With this step-by-step guide that will help you install your CCTV system quickly and have security, you can have knowing your home is secure.
If you’re looking for an installation that is professional, iGeniee offers expert CCTV camera installation services in Chandigarh. With their knowledge and experience, it is possible to be sure that your security system for your home is installed correctly and offers reliable security. Contact iGeniee today to find out more about their offerings and to secure your home with excellent CCTV security.